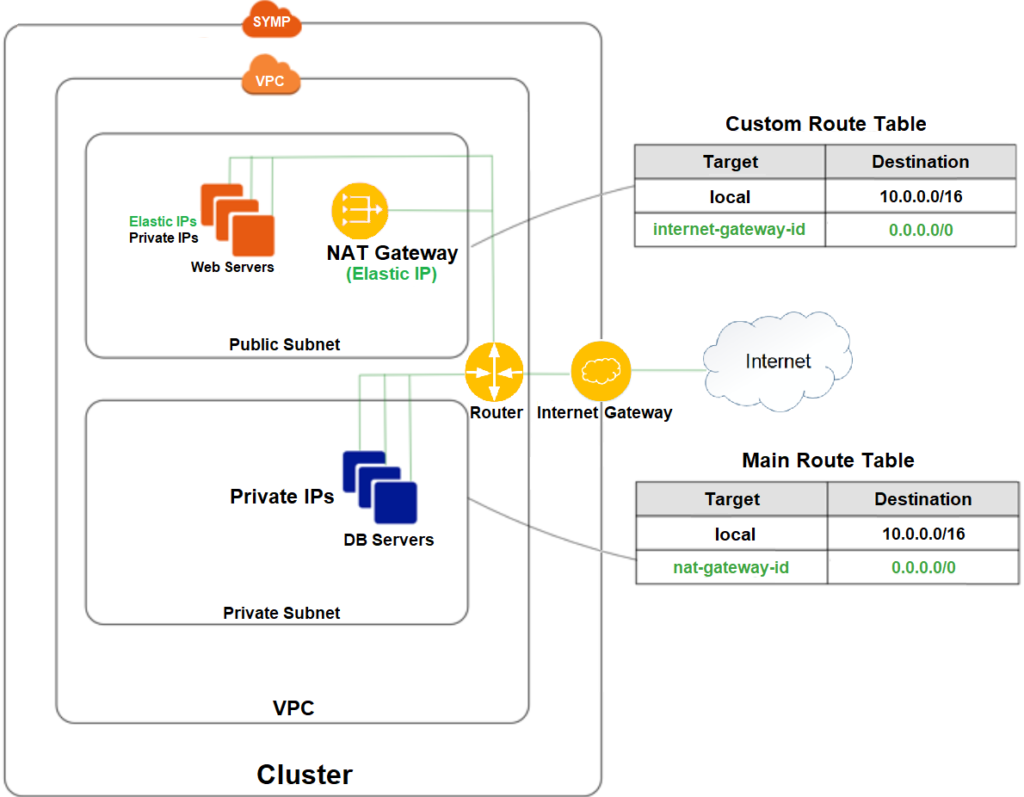
NAT Gateways
In cloud environments, an internet gateway is a resource that allows instances in a private network to connect to the internet. It provides both inbound and outbound internet access to resources in a Virtual Private Cloud (VPC), acting as a bridge between the private network and the internet.
Here is an overview of its key features and considerations:
Key functions of an internet gateway:
- Network Address Translation (NAT): Provides network address translation, allowing resources with private IP addresses to connect to the internet without exposing their private IPs directly.
- Route configuration: The internet gateway must be associated with a specific routing table in the VPC. For instances to access the internet, the routing table must direct traffic for IP addresses outside of the VPC to the internet gateway.
- Bidirectional connection: While typically used for outbound traffic, it also supports inbound requests if allowed by resources such as load balancers or specific instance rules.
- No public IP, no internet: To access the internet, an instance requires both a public IP address (or elastic IP address) and an associated internet gateway in the VPC.
Creating a NAT gateway:
To create a NAT gateway:
- Navigate to Network > NAT Gateways.
- On the top toolbar, click Create.

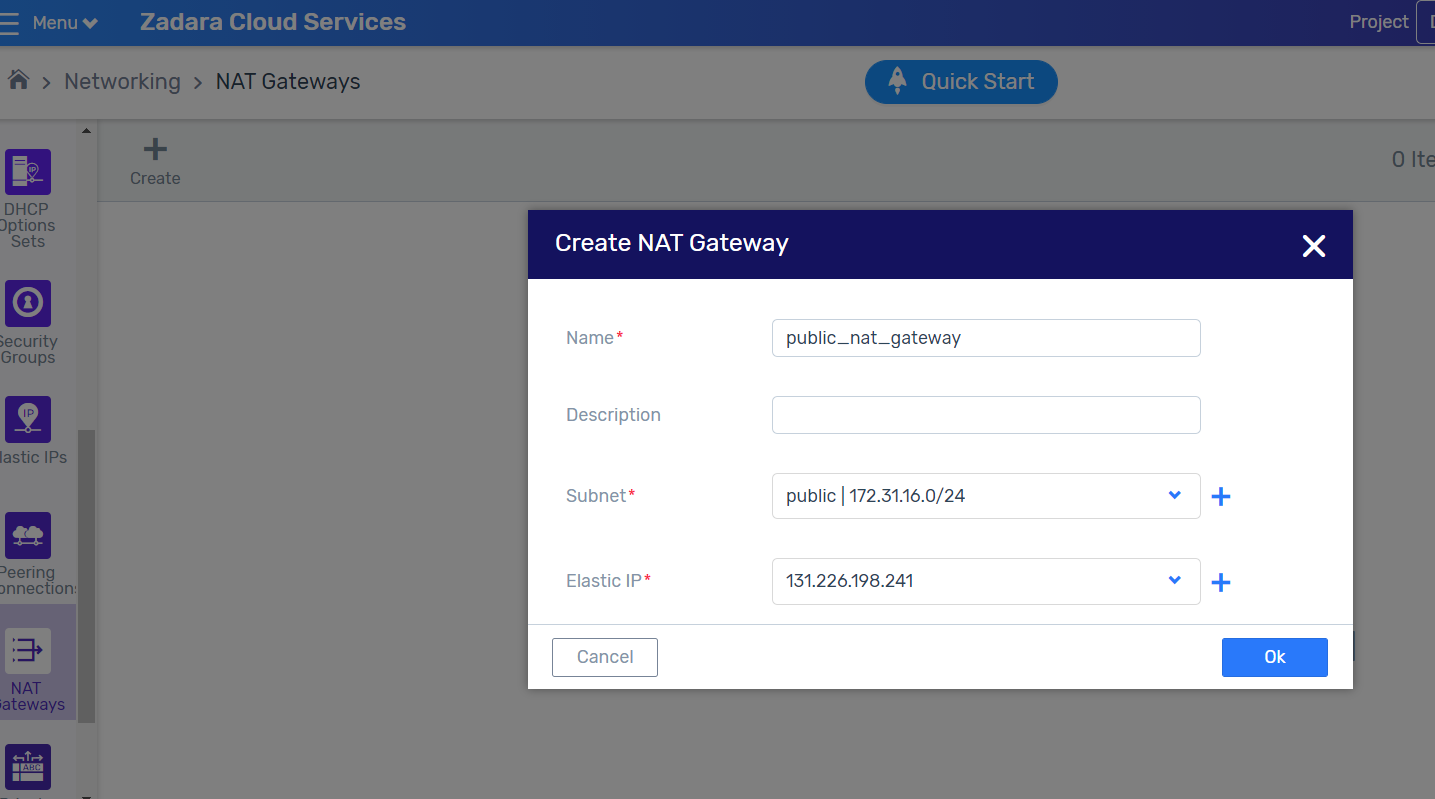
In the "Create NAT Gateway" dialog box, enter the following:
- Name – the name of the NAT gateway.
- Description – an optional description for the NAT gateway.
- VPC – the VPC associated with this routing table.
- Subnet – select the subnet where the NAT gateway will reside.
- Elastic IP – choose an elastic IP for the NAT gateway.
Click OK.
After creating the NAT gateway, update the routing table associated with at least one of your private subnets to ensure that Internet-related traffic is directed to the NAT gateway.
Instances in your private subnets can now interact with the Internet.
Example of NAT Gateway Configuration Flow
The following procedure is an example of a complete end-to-end configuration, including VPC configurations and routing tables associated with NAT gateways.
To create a VPC with a NAT gateway:
- Go to Networking > VPC and click Create.

In the Create VPC window, choose an existing internet gateway from the dropdown list or create a new one by clicking +.
Create two subnets in the VPC: name one Public and the other Private.
Go to Networking > Subnets and click Create.
In the Create Subnet window, create a subnet named public.
Click OK.
Click Create again.
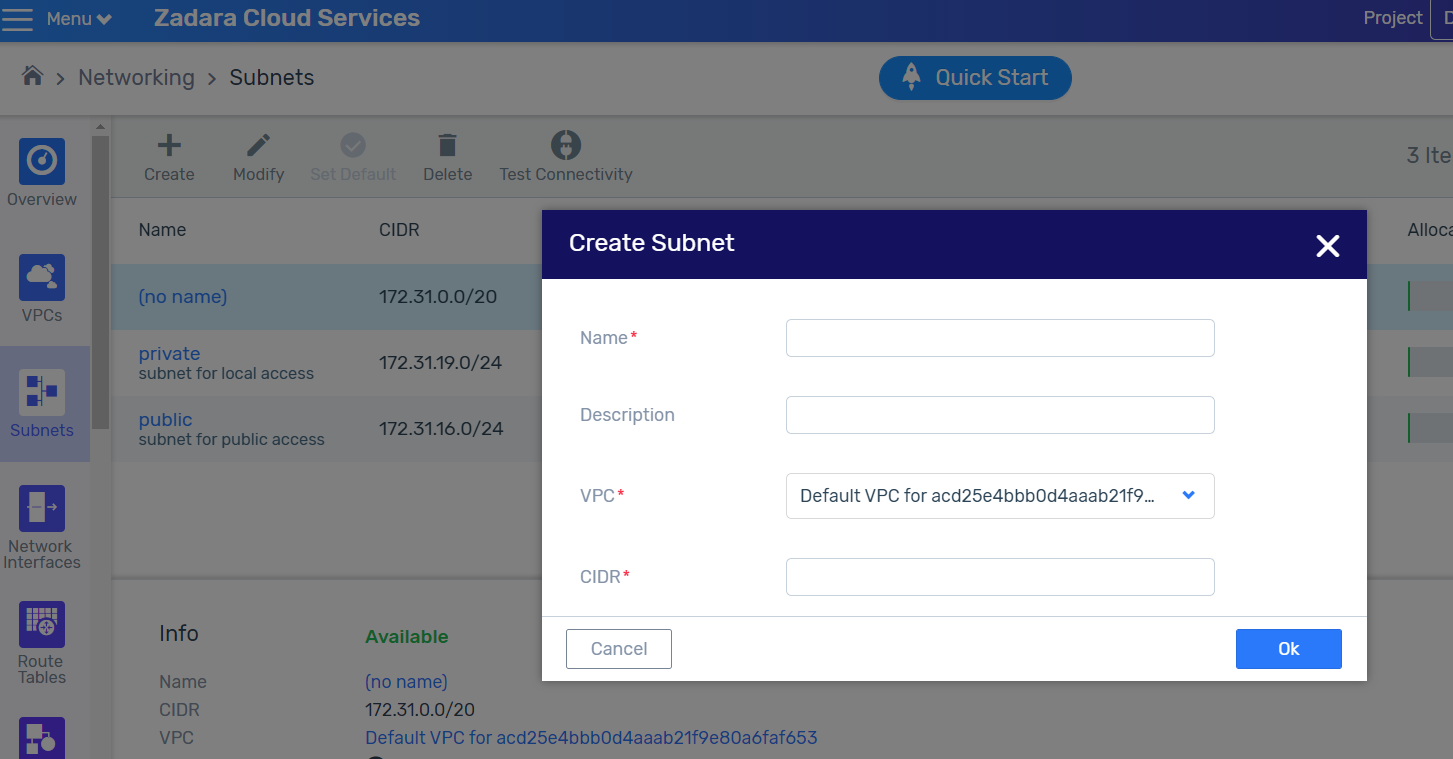
In the Create Subnet window, create a subnet named private.
Click OK.
Create two routing tables in the VPC: name one public and the other private.
Go to Networking > Routing Tables and click Create.
In the Create Routing Table window, create a routing table named public.
Click OK.
Click Create again.
In the Create Routing Table window, create a routing table named private.
Click OK.
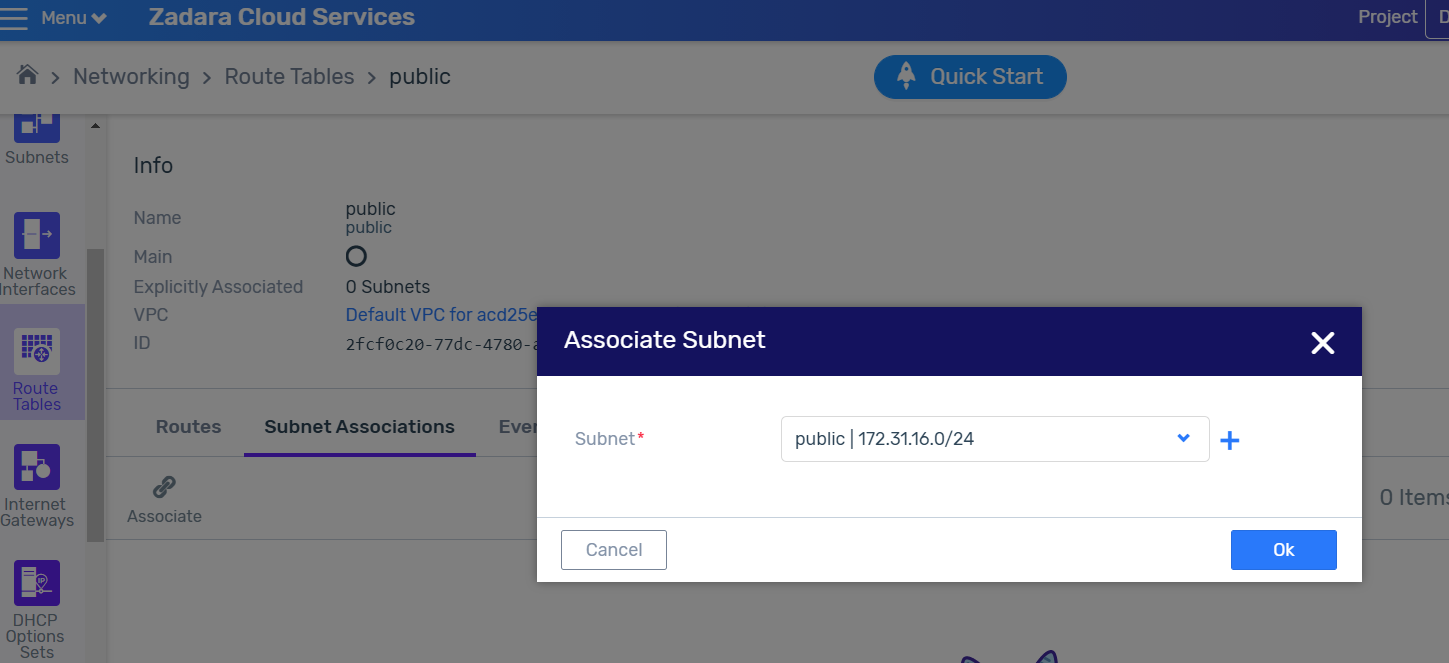
Associate the public subnet with the public routing table, and the private subnet with the private routing table.
Go to Networking > Routing Tables and click the public routing table.
At the bottom of the screen displaying routing table details, select the Subnet Associations tab.
Click Associate.
В окне «Связать подсеть» свяжите публичную подсеть с публичной таблицей маршрутизации.
Нажмите ОК .
Перейдите в раздел «Сеть» > «Таблицы маршрутизации» и щелкните частную таблицу маршрутизации.
В нижней части экрана, отображающего сведения о таблице маршрутизации, выберите вкладку Ассоциации подсетей .
Нажмите «Связаться» .
In the Associate Subnet window, associate the public subnet with the public routing table.
Click OK.
In the Associate Subnet window, associate the public subnet with the public routing table.
Click OK.
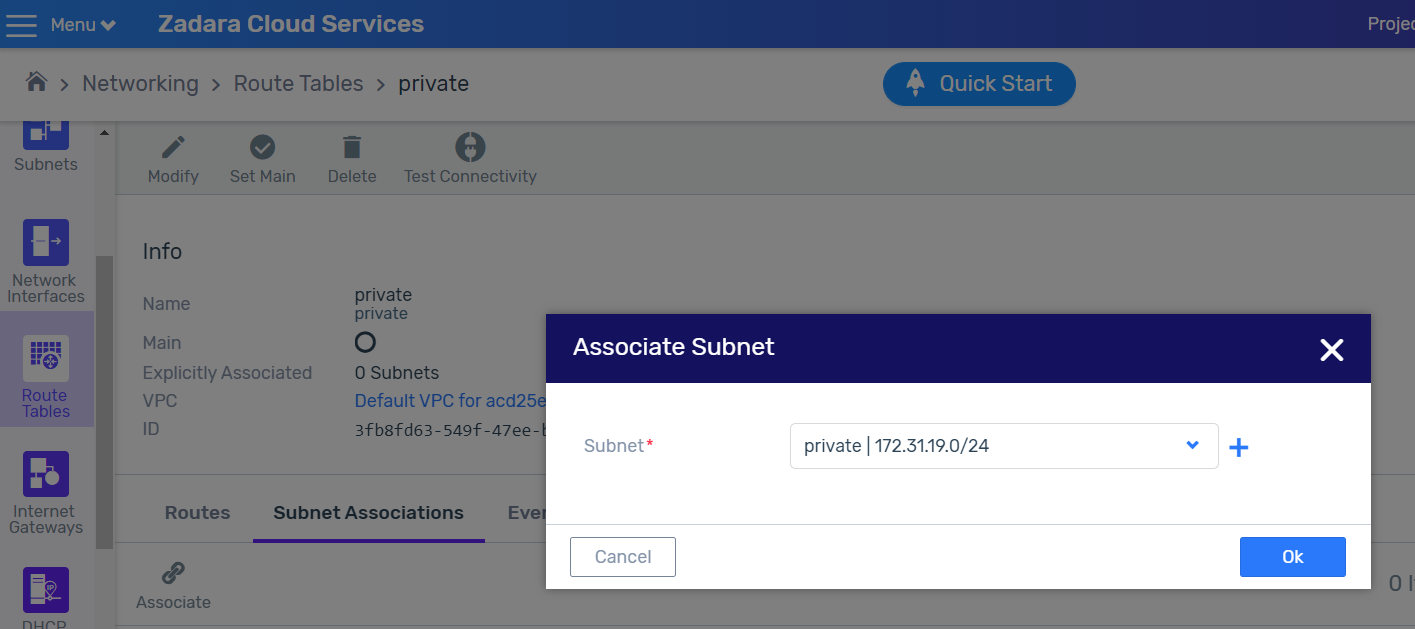
Go to Networking > Routing Tables and click the private routing table.
At the bottom of the screen displaying routing table details, select the Subnet Associations tab.
Click Associate.
In the Associate Subnet window, associate the private subnet with the private routing table.
Click OK.
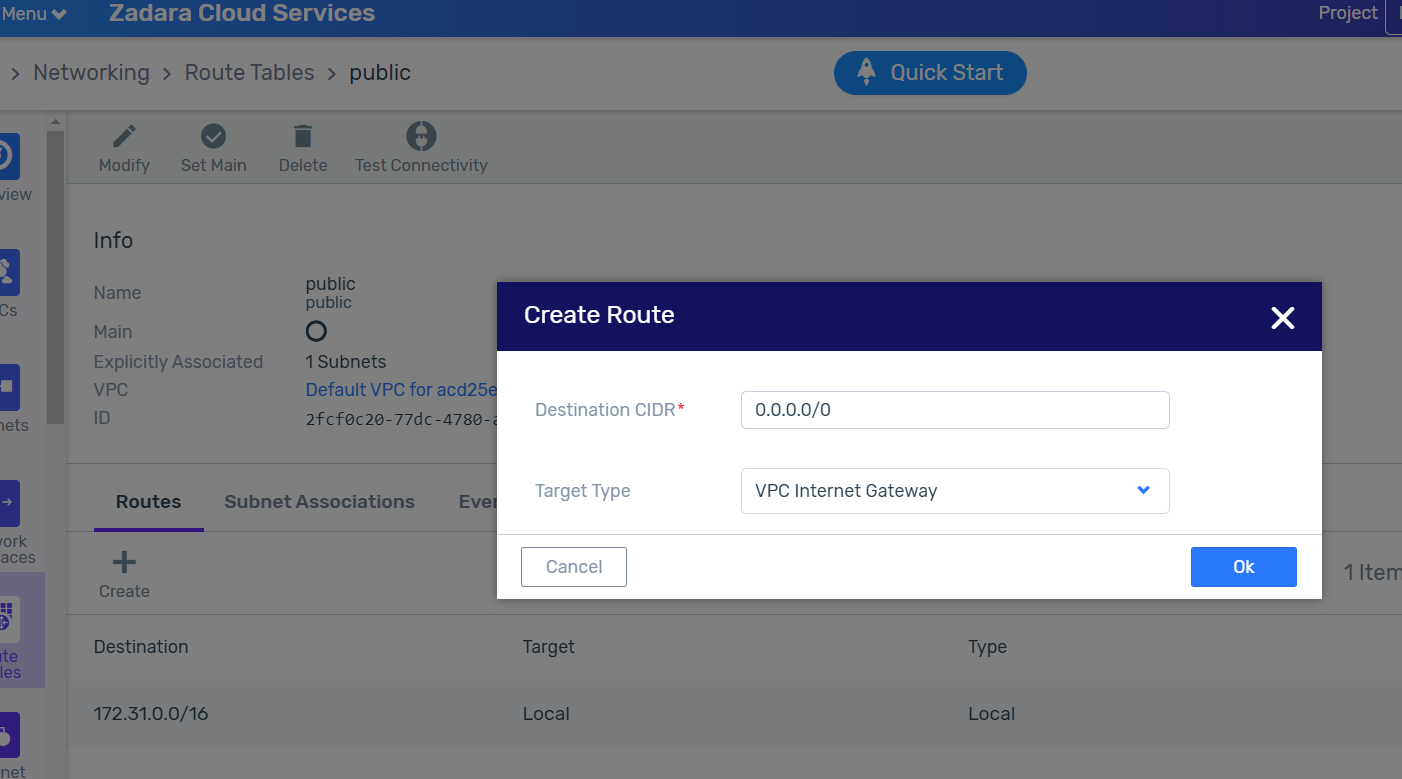
In the public routing table, create a default route with the VPC Internet Gateway as the target.
Go to Networking > Routing Tables and click the public routing table.
At the bottom of the screen displaying route details, select the Routes tab.
Click Create.
In the Create Route window, create a default route (0.0.0.0/0) with the VPC Internet Gateway as the target.
Click OK.
Create a NAT gateway in the public subnet and assign it an elastic IP. Wait for the NAT GW state to change from pending to available.
Go to Networking > NAT Gateways and click Create.
In the Create NAT Gateway dialog, select an existing Elastic IP address from the dropdown list or click + to create a new one.
Click OK.
In the private routing table, create a default route with the newly created NAT gateway as the target.
Go to Networking > Routing Tables and click the private routing table.
At the bottom of the screen displaying route details, select the Routes tab.
Click Create.
In the Create Route window, create a default route (0.0.0.0/0) with the newly created NAT gateway as the target.
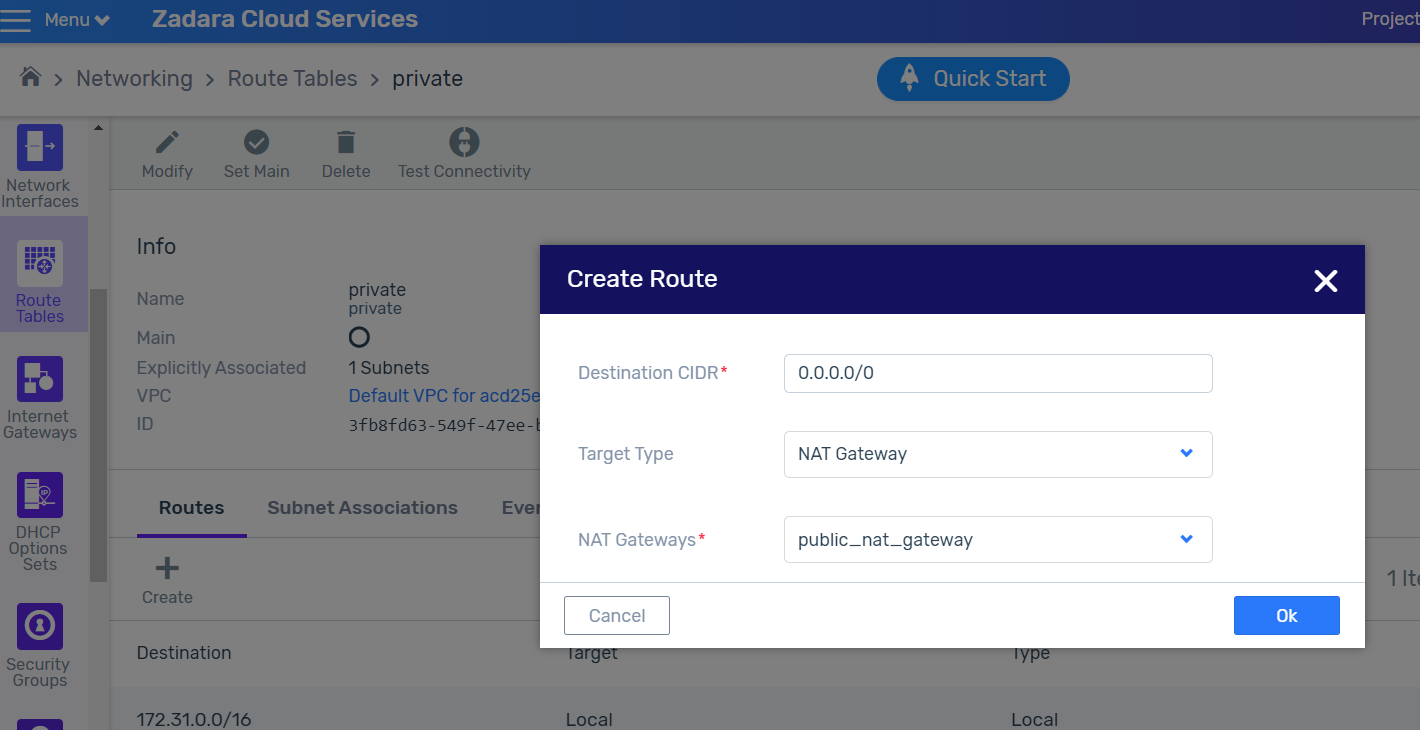
Click OK.
Create a virtual machine in the private subnet.
Go to Compute > Instances and click Create.
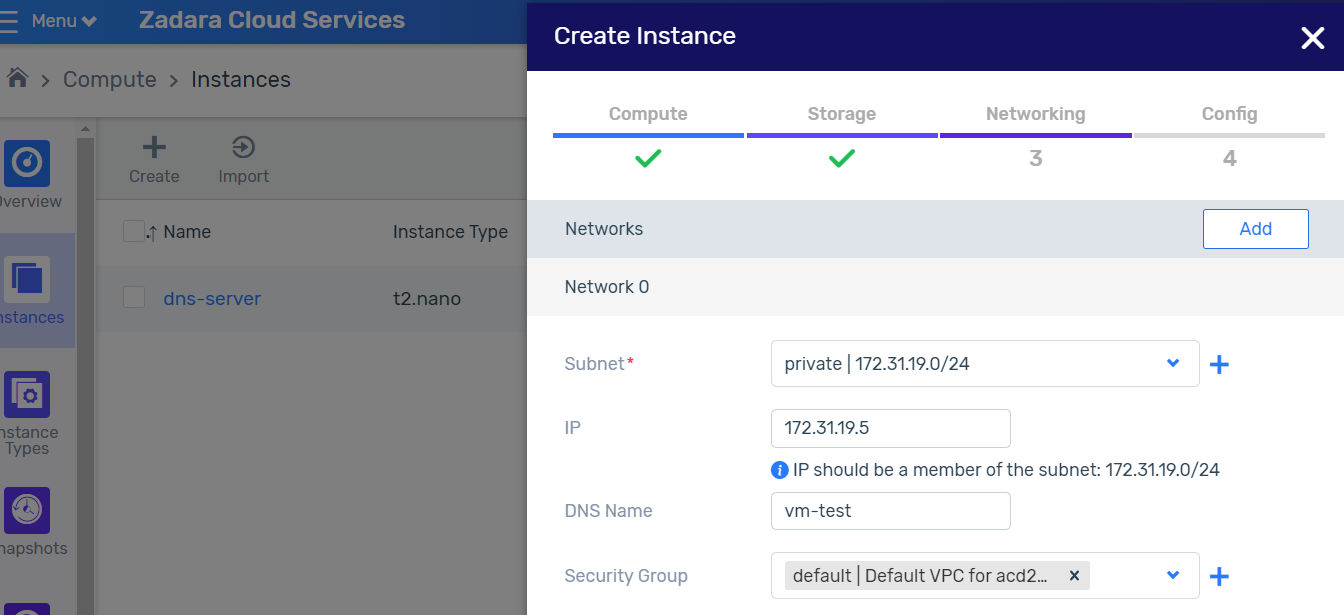
In the virtual machine creation wizard, link the virtual machine with the created private subnet.
Now you can connect the virtual machine to the Internet via the elastic IP address of the NAT gateway.
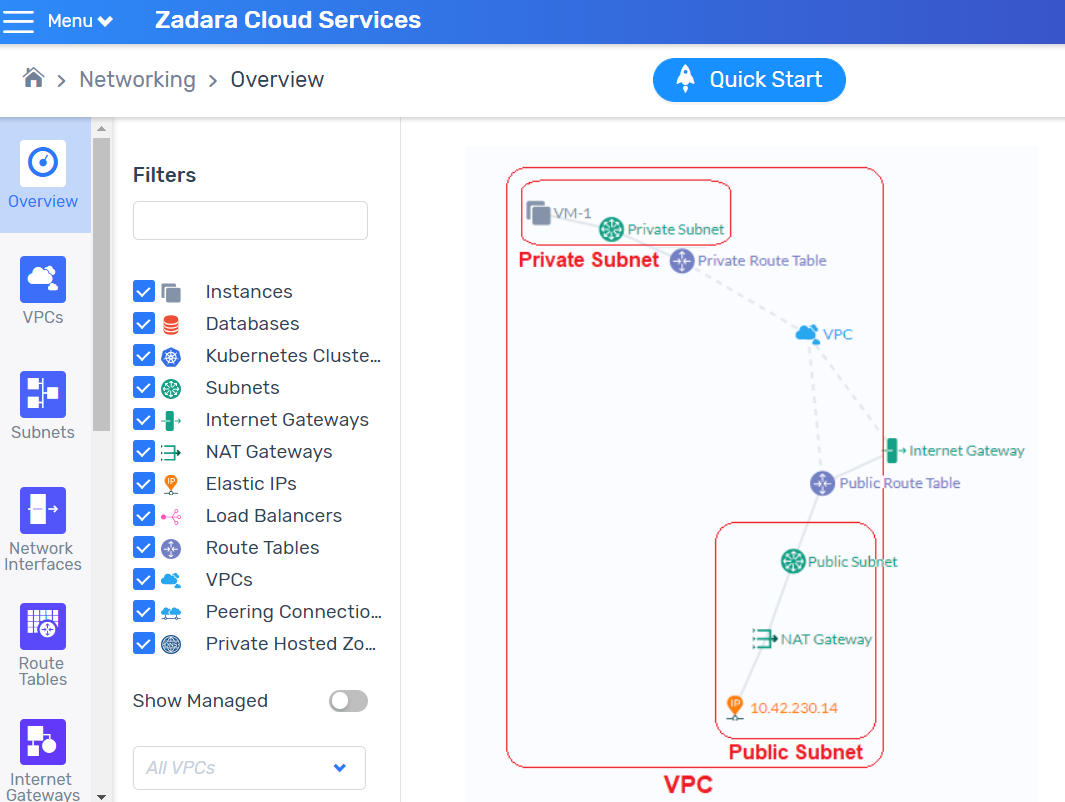
View the NAT gateway network topology diagram in the VPC.
On the Networking > Overview screen, view the VPC network topology.
Get a consultation from a manager!
Do you need to clarify the details? Discuss the requirements? Do you have a difficult project? We will help you find the right solution.
'/%3e%3cdefs%3e%3clinearGradient%20id='paint0_linear_1362_1644'%20x1='98.2981'%20y1='-36.0977'%20x2='98.2981'%20y2='180.309'%20gradientUnits='userSpaceOnUse'%3e%3cstop%20stop-color='white'%20stop-opacity='0.8'/%3e%3cstop%20offset='1'%20stop-color='%23B5E275'/%3e%3c/linearGradient%3e%3c/defs%3e%3c/svg%3e)